Instagram API – Instagram Graph API (Instagram API V2) Integration Log
An overview of updates to Instagram's open API and the new Instagram Graph API.
Overview
The Instagram Legacy API has been widely used to show your own Instagram photos on a personal blog or website.
However, in 2020 Instagram officially announced the end of support for the Legacy API and introduced a new integration API, the Basic Display API.
Following this policy, we at STUDIO-JT ran a number of tests to migrate from the Legacy API to the Basic Display API. We wrote this post to share what we learned from those tests and help more developers use the Instagram API easily.
How to integrate Instagram Basic Display
1. Log in to Facebook for Developers and create an app
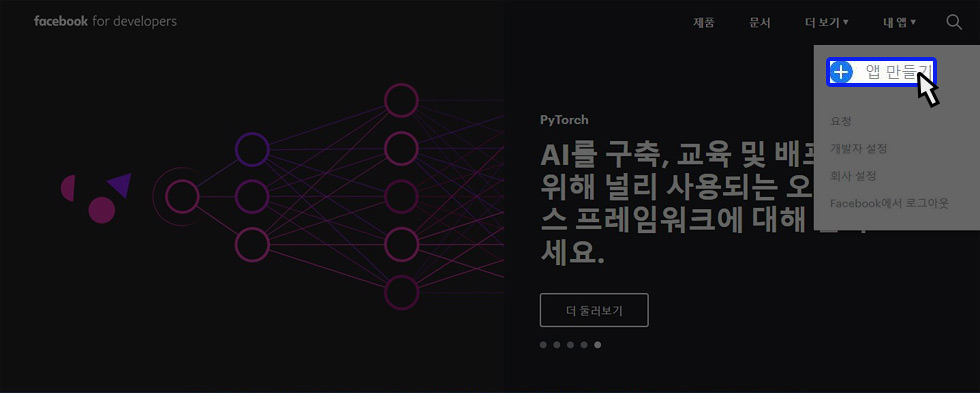
Go to Facebook for Developers, log in, and click the “My Apps – Create App” button.
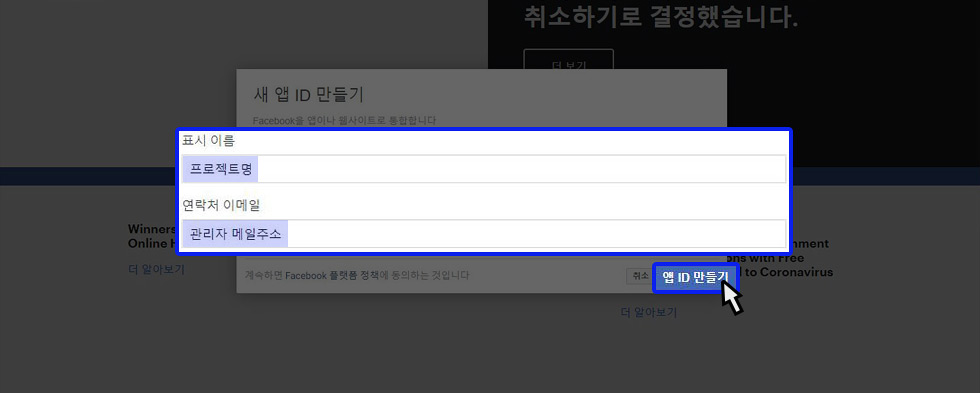
Enter the app’s basic information, then click the “Create App ID” button to create the app.
2. Add a platform
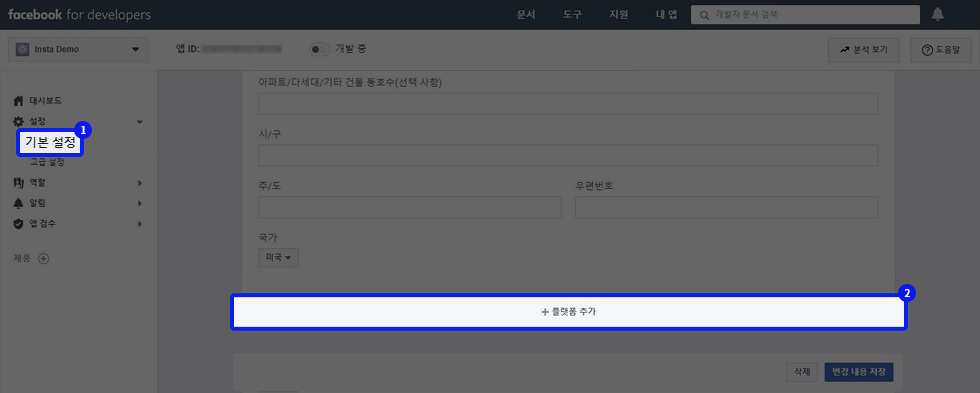
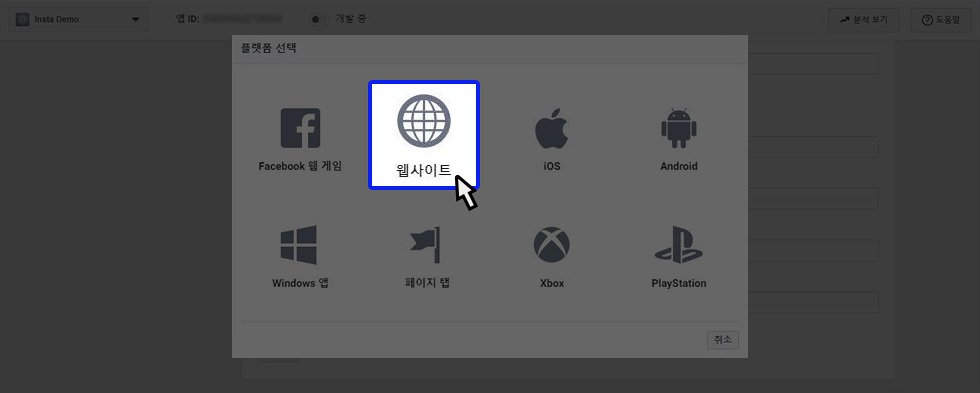
Go to the admin screen of the app you created and click “Settings – Basic – Add Platform.”
※ This guide targets a website, so we added the “Website” platform.
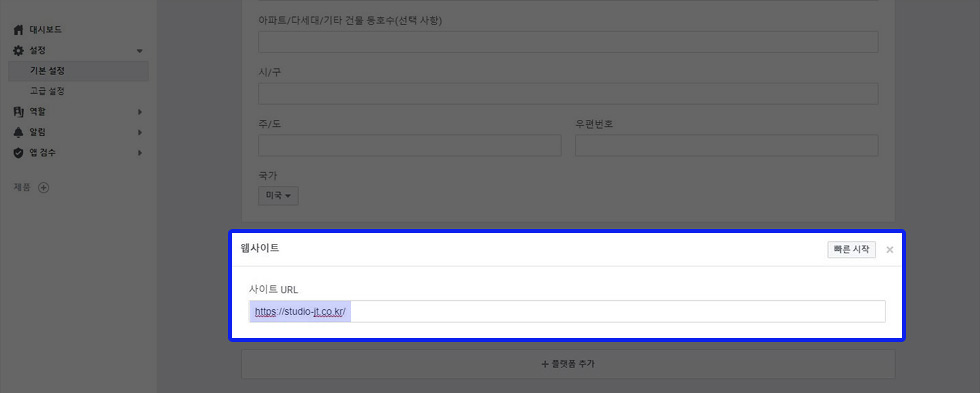
3. Enter the platform’s basic information
After adding the Website platform, enter the URL of the site you will run in the input field that appears, then click “Save Changes.”
4. Add Instagram
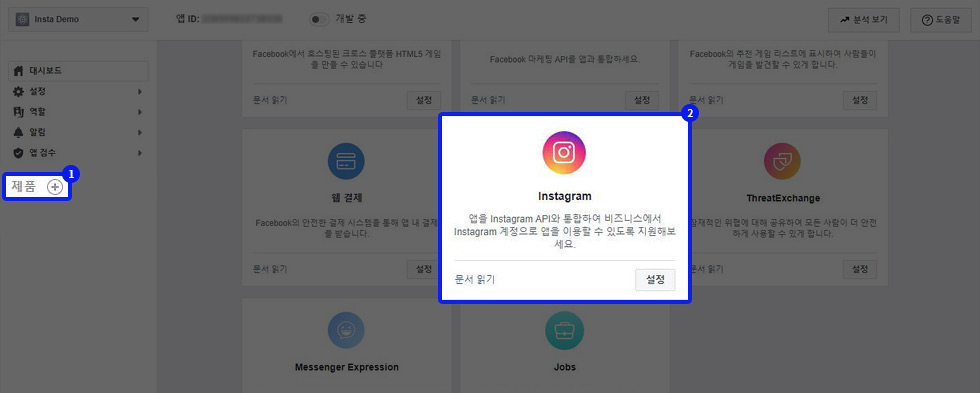
Click the Add Product button and add Instagram.
5. Add an Instagram app
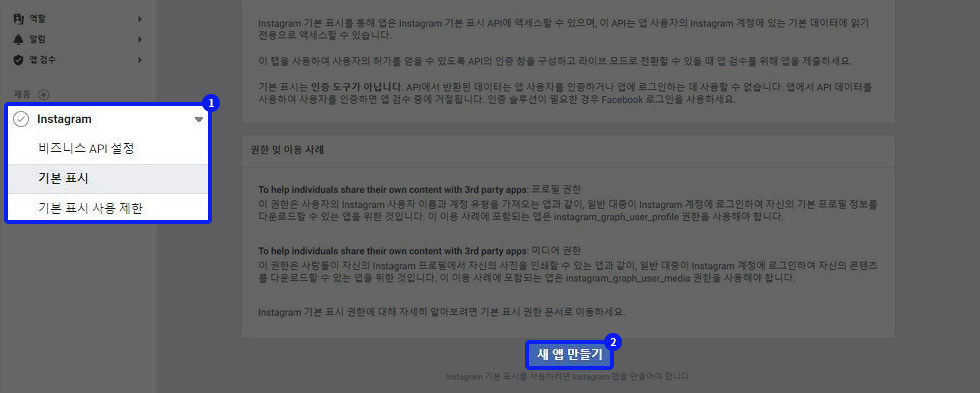
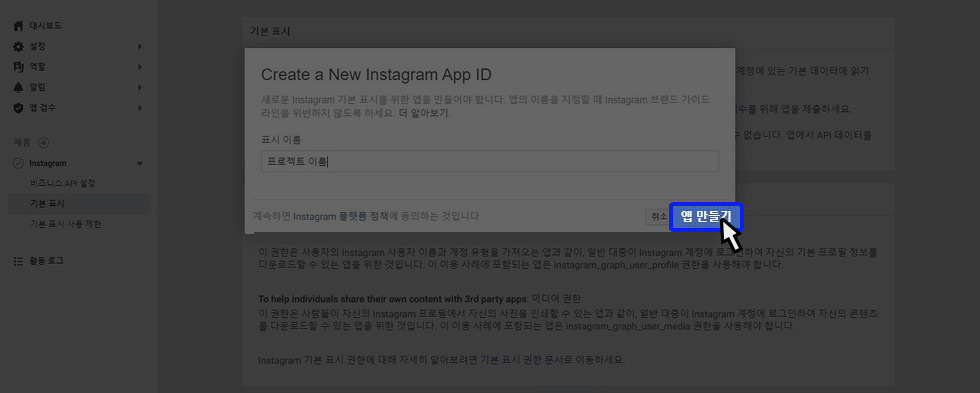
In the Instagram management menu, click “Basic Display – Create New App,” enter a project name, and click Create App.
(The project name is shown in the Instagram admin, so it is best to make it clear.)
6. Set up the Instagram App ID
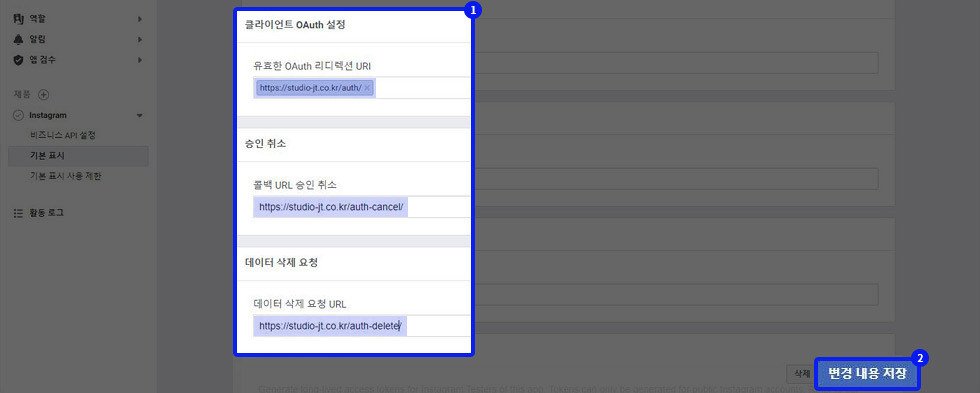
After the Instagram App ID is created, enter the three URLs shown in the screenshot below and click “Save Changes.”
These URLs aren’t actually used while using the Basic Display API, so it’s fine to enter URLs of pages that don’t exist.
(You can change them later when you add authentication features such as Instagram login.)
7. Set up token issuance
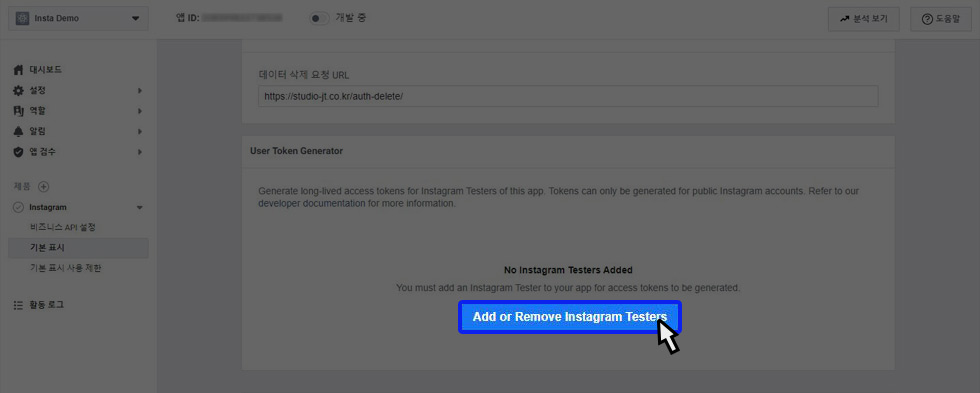
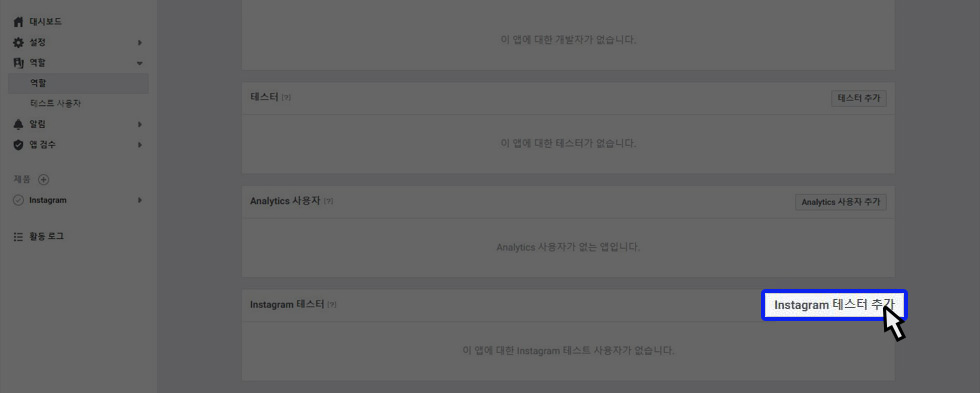
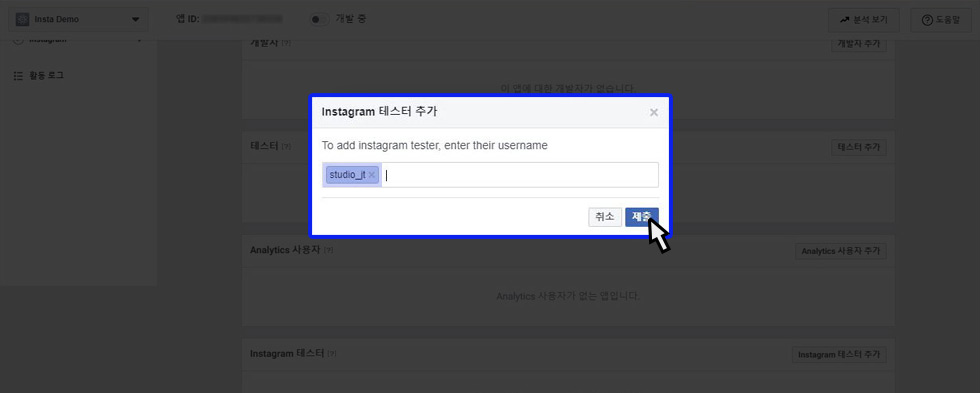
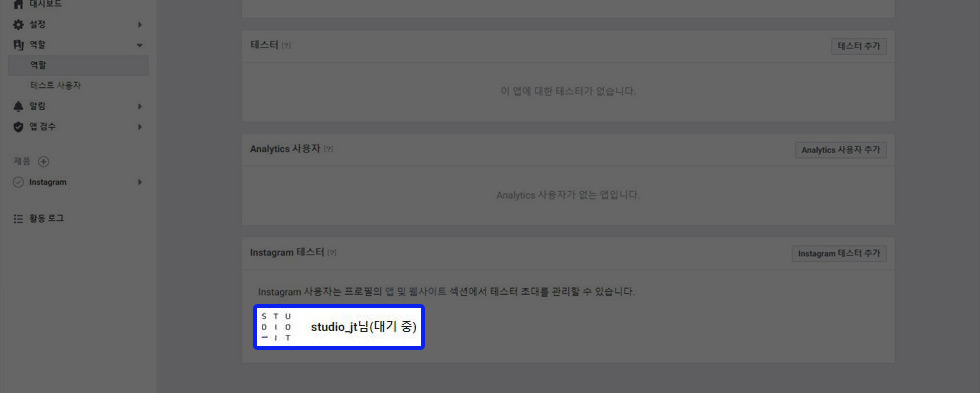
Under User Token Generator at the bottom of Basic Display, click the “Add or Remove Instagram Token” button, go to the page, and click “Add Instagram Testers.”
Enter the username of the account whose Instagram posts you want to integrate. If it was added successfully, the account information appears in the Instagram Testers section.
8. Accept the Instagram integration
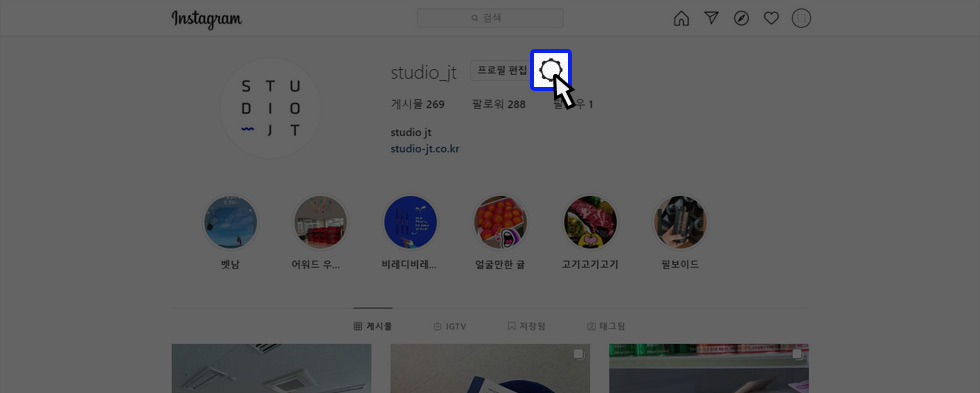
Log in with the Instagram account you registered above,
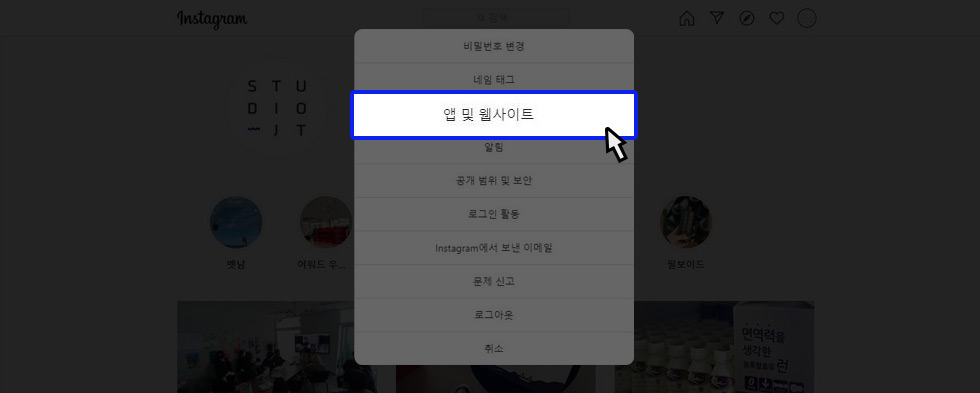
click the settings button, and choose “Apps and Websites” from the settings list.
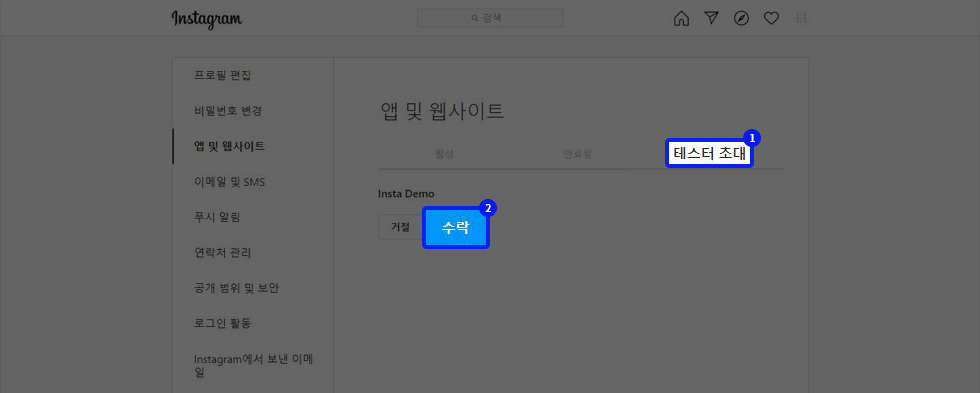
On the settings page, go to the “Tester Invites” tab and accept the request sent from Facebook.
The invite title shows the project name you created in Step 8.
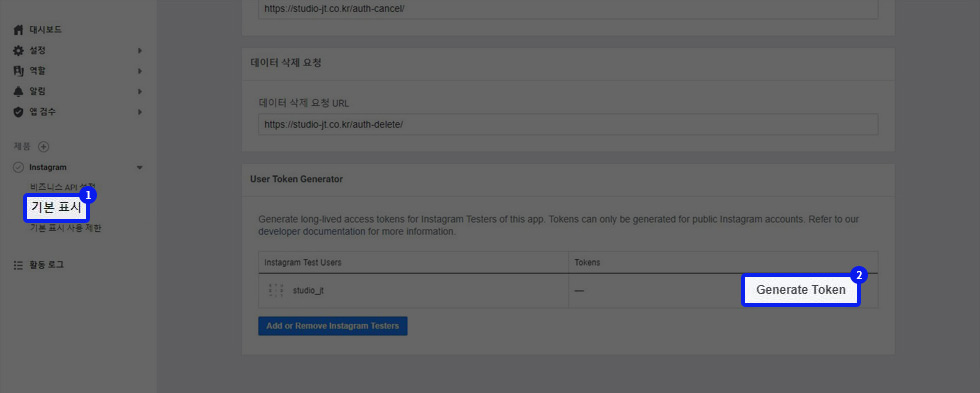
9. Issue a token
After accepting the invite on Instagram, go back to “Basic Display – User Token Generator” in Facebook for Developers, and you will see that a “Generator Token” button has been added on the right.
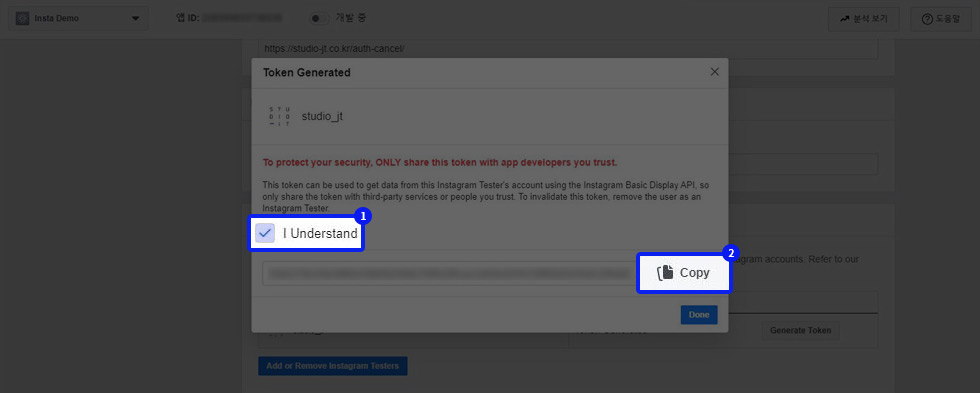
Click “Generator Token,” check the consent box in the token pop-up that appears, and copy the issued token.
You will use this token to fetch Instagram posts, so be sure to save it.
10. Build the integration
Write the Instagram integration script using the issued token and Facebook’s Basic Display Guide.
In place of the development code, we provide a demo!
Facebook developer guide
instagram basic display api guides
Reference links
- Instagram update announcement: https://developers.facebook.com/blog/post/2018/01/30/instagram-graph-api-updates/
- Instagram Graph API information: https://developers.facebook.com/docs/instagram-api/overview
Mar.2020By Studio JT